Showing posts with label tomato sauce. Show all posts

Saturday, 25 April 2015

Gołąbki - Polish cabbage rolls


Polish food is one of the most famous foods in the Western world. Along with Pierogi - Polish dumplings, Gołąbki - Polish cabbage rolls are a favourite not just with people of Polish origin but with anyone that has the honour of biting into these tasty traditional dishes. Once eaten, you will come back for more, guaranteed. These cabbage rolls are well worth boiling and separating the cabbage leaves (the tricky bit). I can vouch that once cooked these cabbage rolls are addictive. I used a mixture of minced beef and pork and the result was some really delicious, tasty and juicy cabbage rolls. If you find it you can also add some minced veal as well. The accompanying tomato sauce gives it the Eastern European taste, the tanginess of the tomato sauce, the sweetness of the caraway seeds, the herbiness of the marjoram and parsley...oh, heaven! Give them a go, you will not be disappointed. You will need...

For the Gołąbki - cabbage rolls
  • 1 large cabbage head
  • 750g minced beef & pork
  • 1 large carrot, grated
  • 2 eggs
  • 1 cup cooked rice, cold
  • 250ml (1 cup) tomato passata + ½ cup tomato passata
  • 1 onion, finely chopped
  • 2 garlic cloves, finely chopped
  • 1 ½ teaspoons salt
  • Fresh ground black pepper, to taste
  • A knob of butter, for frying
For the tomato sauce
  • 300ml (1 ½ cups) beef stock
  • 1 heaped tablespoon tomato paste
  • 175ml (¾ cup) tomato passata
  • ½ teaspoon dried marjoram
  • 2 teaspoons dried parsley
  • ½ teaspoon caraway seeds
  • 1 teaspoon sugar
  • Fresh ground black pepper, to taste
  • 30g butter
  • 30g plain flour

How to...
  1. Start by boiling a very large pot of salty water. Now put the cabbage core end up and using a paring knife remove the hard core. Put the cabbage in the boiling water and boil for about 10 minutes. At this point some of the leaves will start to come off, that is what we want. After 10 minutes, carefully take the cabbage out of the boiling water, be very very careful as it will be very hot. Use 2 large spatulas or ladles when doing this process. Leave to cool slightly. When slightly cool, start peeling off the cabbage leaves with extreme care (remember they are the star ingredient of the dish). Separate them and put them flat on a platter and set aside to cool further.
  2. Now it is time to prepare the filling. Start by frying the onions and garlic in the butter until brown (about 5 minutes on medium heat). Set aside to cool. In a large bowl add the minced meat, cooked rice, grated carrot, passata, eggs, cold fried onion/garlic mixture and salt & pepper. Put a pair of gloves on (optional) and mix by hand until all ingredients are incorporated, do not mix too much or else the meat will toughen. 
  3. Preheat the oven to 180°C/350°F.
  4. Now here comes the fun part, firstly if the spine of the leaf is too tough carefully trim it with a sharp knife). Now spread the cabbage leaves end bit away from you, put some filling (about a tablespoon or more...this depends on the size of the leaf), now roll the sides first and roll up all the way up to the stalk/spine part. Stack them up into a casserole next to each other (see picture).
    Keep going until all the filling is used up. If you have spare leaves or torn leaves save them so you can cover the rolls in the end. 
  5. Now fill the casserole with water half way up to the rolls and add the half cup of passata. Spread the torn/spare leaves on top, cover and put into the preheated oven for 30 minutes.
  6. Whilst they are cooking away, start the tomato sauce by melting 30g butter, add the flour and cook stirring constantly for about 2-3 minutes. Add all the other sauce ingredients and stir until thickened, lower the heat and simmer for about 10 minutes, make sure you keep on stirring or it will stick to the bottom of the pot. Turn off the heat and remove from the heat.
  7. After 30 minutes take the cabbage rolls out of the oven and pour the tomato sauce on top, cover again and put in the oven for another 30 minutes.
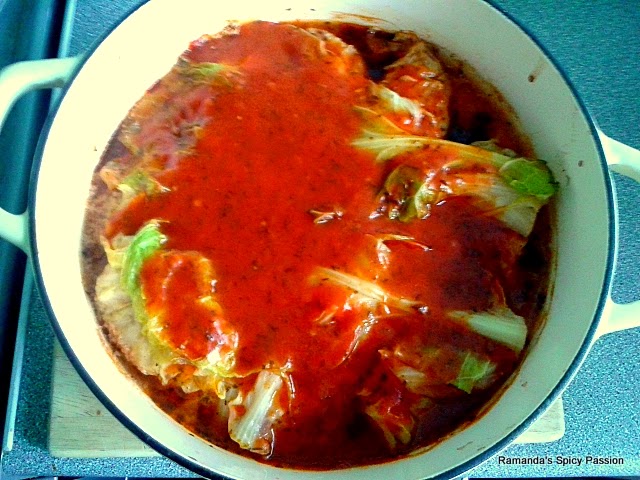
  8. Take out of the oven, let stand for about 10 minutes and serve hot with a couple of spoonfuls of tomato sauce on top. Gołąbki can also be enjoyed cold as appetizers...an absolute delight!!
Enjoy!!

R&A

Sunday, 15 March 2015

Divine Meatballs in Tomato Sauce

Spaghetti meatballs is one of my favourite pasta dishes. I love its meatiness, its tomatoey goodness. Absolutely divine!! This dish is an Italian-American classic and "It is widely believed that spaghetti with meatballs was an innovation of early 20th-century Italian immigrants in New York City; the National Pasta Association (originally named the National Macaroni Manufacturers Association) is said to be the first organization to publish a recipe for it, in the 1920s" - Wikipedia. Usually meatballs are done with 2 or 3 different types of minced meat, namely beef, pork and veal but I decided to do ours using lean beef mince and they turned out super delicious and very tasty. You can serve them the classic way (with pasta) or else with some crusty bread. Instead of spaghetti this time we used Fusilli lunghi bucati which are long thin fusilli shapes tubes, For 12 meatballs you will need...


For the meatballs...

  • 500g lean beef mince
  • 1 egg
  • 1 cup breadcrumbs (I used Panko)
  • ½ cup grated parmesan
  • 1 tbsp dried parsley
  • 1 tbsp dried oregano
  • ½ tsp salt
  • ½ tsp ground black pepper
  • 2 garlic cloves, minced
  • ½ cup water
For the tomato sauce...

  • 500ml tomato passata
  • 1 tin plum tomatoes
  • 1 tbsp tomato paste dissolved in 200ml boiling water
  • 1 small onion finely chopped
  • 2 garlic cloves, minced
  • ¼ tsp dried basil
  • 1 tsp sugar           
  • Salt & pepper
  • Olive oil
How to...
  1. Preheat the oven to 200°C.
  2. Now start preparing the meatballs. In a large mixing bowl add all the meatball ingredients apart from the water and mix well (I use my clean hands, this way the flavours infuse better into the meat). Gradually start adding the water bit by bit until you get a wet but not too much mixture.
  3. Shape into 12 meatballs (about 60g each) and place on a baking tray lined with greaseproof paper. Put into the preheated oven for about 15 minutes.
  4. In the meantime start the tomato sauce. Heat about 2 tablespoons olive oil and add the onion and garlic and cook until translucent, add the rest of the ingredients and some extra-virgin olive oil, bring to the boil and simmer for about 10 minutes. Take the meatballs out of the oven.
  5. Now lower the heat add the meatballs to the tomato sauce and simmer covered for about 45 minutes on low heat. Stir only once.
  6. Serve hot with pasta or bread and extra grated parmesan.
Enjoy!!
R&A


Saturday, 11 October 2014

Njokki l-forn - Maltese Baked Ricotta Filled Pasta Shapes


When my family visited us this summer, as per usual the food ration package came from Malta with them and this time I told my dad to bring me some Njokki. In Malta we call Njokki (Nyok-key...basically a Maltese version of the word gnocchi) large snail shaped pasta (in fact in Italy they are called Lumaconi-large snails) that originally come from the southern region of  Campania in Italy that in Malta are traditionally filled with a ricotta and egg mixture, soaked in milk, topped with a corned beef-tomato sauce, grated cheese and baked in a hot oven. The result is a very traditional Maltese dish that oozes with cheesiness and tomatoey goodness comes from a very old recipe. My mother always says that is was one of my grandfather's favourite dishes. Preparing this dish took Amanda and myself through a nostalgic trip to our childhood as both of us used to help our mothers and grandmothers fill these pasta shapes and it was definitely one of the highlights of our childhood. If you do not fancy a corned beef sauce you can use any meat you want but just make sure you cook the meat accordingly. You can even leave the meat out for a vegetarian dish. My mother always told me that for this recipe my grandfather used to fill the Njokki and leave them soaking in milk for a couple of hours so as the pasta shells soften but if you are in a rush you can skip this step, we did, and they turned out great!! Now re portions with a large packet of Njokki-Lumaconi we made enough grub for 8 people in fact this was a two-day meal for us (even taking a portion at work with me). You can always freeze the leftovers in tubs. So, for 8 portions, you will need...

1 500g packet Njokki/Lumaconi pasta shapes (see picture)

For the Ricotta mixture

800g fresh ricotta 
3 eggs
½ tablespoons dried or freshly chopped parsley
Salt & freshly ground black pepper, to taste

For the tomato sauce

1 large tin corned beef
2 garlic cloves, crushed
2 tins chopped tomatoes
1 tablespoon vegetable oil
Freshly ground black pepper
750 ml whole milk
Grated mature Cheddar cheese or Edam cheese, to taste

How to...
  1. Start by preparing the ricotta mixture by adding the ricotta, eggs, parsley and seasoning in a large bowl and mix well until you get a consistent mixture. 
  2. When this is done, carefully starting filling the pasta shapes with a teaspoon, make sure you press the filling tightly in the shape (so it won't run away my nanna used to say).
  3. Place the filled pasta shapes in two deep oven trays next to each other (see picture). 
  4. Now gently pour milk until the filled pasta shapes are next to half way submerged. Leave to stand as long as you want (we left them for 15 minutes...we were very hungry). 
  5. Whilst the pasta shapes are soaking prepare the tomato sauce. On a low to medium heat heat the garlic and oil and until garlic turns golden, Add the corned beef and cook for a couple of minutes, add the chopped tomatoes and season well. Simmer for about 20 minutes.
  6. Preheat your oven to 180°C/350°F/Gas Mark 4. 
  7. When the sauce is done, using a ladle or large spoon gently pour sauce of top of the milk drenched pasta shapes. When all the sauce is used shake the dish slowly so as the wonderfully smelling tomato sauce mixes with the creaminess of the milk. Apparently, this is a very important step my mother says.
  8. Top with the grated cheese and bake into the hot oven for 50 minutes or until top is nice golden and pasta shells are done.
  9. Take out of the oven and leave to set for about 10 minutes.
  10. Serve warm.
Enjoy!!
R&A

Sunday, 13 October 2013

Veggie Loaf with Millet

When I was a kid my mum used to do a very healthy vegetable loaf which all of us used to love. It contained millet which is a high-protein grain which is mainly grown for use as bird seed. This grain is highly nutritious and is a staple food in most African countries, India, China, Burma, North Korea. Interestingly enough it is also used to prepare Tongba which is a millet-based alcoholic beverage in Nepal. Millet grain is usually found in health food stores (in Malta we used to buy it from Good Earth and here in England we buy it from Holland & Barrett or Grape TreeAnyway, this loaf is very tasty and filling and we used to love it when we came back from school. It is 100% vegetarian and if you want to turn it into a vegan dish just omit the cheese and egg and add a teaspoon of Marmite instead of the cheese and more millet instead of the egg, to bind the loaf. Make sure the vegetables are fresh and that are evenly and finely chopped to ensure that everything cooks evenly. If you still cannot find millet you can use bulghur or even barley! I grated the courgette, carrot and mushrooms using my food blender grater attachment. So easy!! Give it a go, it is so tasty that you will certainly do it again!! You will need...
  • 65g millet grain
  • 1 small onion, finely chopped
  • 3 celery sticks, finely chopped
  • 1 carrot, finely chopped
  • 1 courgette, finely chopped
  • 100g white mushrooms, finely chopped
  • 1 ripe tomato,de-seeded & finely chopped
  • 100g sweetcorn
  • 2 tablespoons chopped fresh parsley
  • 100g grated mature Cheddar cheese (or a tsp of Marmite for a vegan option)
  • 1 tablespoon olive oil
  • Pinch of cayenne pepper
  • Fine sea salt & freshly ground pepper, to taste
  • 1 beaten egg, for binding
  • Steamed broccoli florets, to serve
  • Fresh tomato sauce, to serve
How to...
  1. Start by cooking the millet by adding it to about 250ml boiling water and simmer it for about 20 minutes until fluffy.
  2. Preheat the oven to 190°C/Gas Mark 5.
  3. In a large bowl mix well the cooked millet with all the other ingredients.
  4. Now line a loaf tin with greaseproof paper and carefully pour all the mixture in the tin. Make sure you pack it tightly by pressing down with a spatula.
  5. Bake in the preheated oven for around 50 minutes. Let it set for about 15 minutes, then carefully turn it upside down. Take off the paper, slice and serve with some steamed broccoli and some freshly prepared tomato sauce (we made a basil & garlic tomato sauce). 
Enjoy!!
R&A

Friday, 9 August 2013

Corned Beef & Tomato Pasta Sauce


This sauce has been a staple in Maltese cooking since the 1940's when canned corned beef came to prominence during WW2. The traditional version of this recipe uses only corned beef and peas (traditionally canned marrowfat peas) but our take on this recipe is really tasty and delicious and full of flavour. We use medium curry powder but you can use mild or hot, depending how spicy you would like it. Serve on top of your cooked pasta or mix it all up just like we do, so all the sauce goes into the pasta. Give this version a go and let us know how it turns out for you! For 4 people you will need...
  • 1 large tin of corned beef, diced
  • 500ml tomato passata
  • 1 large onion, sliced
  • 150g frozen peas
  • 1 tablespoon medium curry powder
  • ¼ teaspoon ground cinnamon
  • ¼ teaspoon ground black pepper
  • ½ teaspoon sugar
  • A few dashes of Worcestershire sauce
  • 2 tablespoon vegetable oil
How to...
  1. Heat the oil in a thick based pan and fry the onion until transparent and just started turning brown, stirring frequently to avoid sticking.
  2. When onion is cooked, add the curry powder, pepper & cinnamon and cook for a minute until spices are fragrant, stirring well.
  3. Add the corned beef and stir well with the onion/spice mixture. Now add some Worcestershire sauce (about 1 tablespoon) and stir well. Cook for a further minute.
  4. Add the passata, sugar and peas and stir well. 
  5. Simmer on medium heat for about 15-20 minutes. (Make sure you keep stirring frequently because the corned beef will stick to the pan).
  6. Turn off the heat and serve with cooked pasta, sprinkled with grated Kefalotiri cheese.
Enjoy!!!
R&A

Saturday, 5 November 2011

Fusilli Pasta Bake with Breadcrumb Topping

We are big fans of creating dishes with whatever we have in our cupboards & fridge. These dishes usually turn out to be a great success and most of all very very tasty. Like this one for example, I decided to give the usual plate of pasta a twist by adding a couple of ingredients like breadcrumbs and grated hard cheese and then put it in the oven to get a nice crunchy pasta dish. It is very simple to prepare, so just give it a go...you will need...
  • 300g fusilli
  • 500ml tomato passata
  • 2 red chillies, deseeded and sliced [optional]
  • 1 small onion, finely chopped
  • 2 garlic cloves, finely chopped
  • Half teaspoon sugar
  • 1 tsp dried oregano
  • Ground black pepper, to taste
  • 100g grated Kefalotiri or Parmigiano cheese
  • Extra virgin olive oil
  • Handful of pangrattato or stale breadcrumbs
How to...
  1. Preheat the oven to 180°C.
  2. Add a tbsp of olive oil to a pan and fry the onion until soft and transparent, about 5 minutes (preferably covered). Add the chillies and garlic and stir fry for a further 2-3 minutes.
  3. Add the passata, sugar, oregano and ground black pepper. Stir well and simmer for about 10 minutes.
  4. In the meantime cook the fusilli al dente. Make sure you do not overcook the pasta.
  5. When the sauce & pasta are cooked, drain the pasta and put back in the pasta pot. Add the sauce, a good amount of extra virgin olive oil and about 2 tbsp of grated cheese. Mix well but slowly, not to break the fusilli.
  6. Pour slowly into a small ovenproof container. Cover the pasta with a handful of breadcrumbs and the remainder of the cheese.
  7. Put in the preheated oven for about 20-25 minutes or until the breadcrumbs & cheese are golden brown.
Enjoy!!
R&A