Showing posts with label traditional. Show all posts

Sunday, 1 November 2015

Pan de Muerto - Mexican Day of the Dead Bread

   
 Pan de Muerto literally means Mexican bread of the dead and is traditionally baked during 'Día de los Muertos'. During that weekend that usually starts from the 31st October and finishes on the 2nd November, Mexicans build altars at home or by their loved ones' graves to remember their departed, these are called Altar de Muertos - Altar of the Dead. On these altars, offerings are put, these ritual offerings usually consist food items, flowers, candles and everyday objects that belonged to the deceased. The altar of the dead is a symbolic construction which is the result of the blend of pre-Hispanic ideologies, endemic worldview of Mesoamerican cultures and European character Abrahamic religious beliefs brought by the Spanish conquistadors and missionaries assigned to the colonization and conversion of native peoples of the current Mexico. [Reference Wikipedia] 

       Food offered usually has to be the deceased's favourite which usually will be a variety of tamales, tacos, moles [Mexican sauces], food made out of corn and seasonal fruits. An item that is always present of the altar of the dead is Pan de Muerto which is put at the altar as a major offering towards the deceased. This particular bread can be found sold in shops all over Mexico during Día de los Muertos. There are different variations of this delicious Mexican bread but the recipe I would like to share with you is the most common one and this particular version is very famous in Central Mexico.

    The particular loaf's shape comes from two finger shaped put across the loaf which represent bones. Traditionally it is served with atoles which are hot drinks flavoured with  a myriad of flavours usually these include cocoa,sugar, vanilla, and honey. These atoles are thickened with corn dough which is dissolved in water. One of the most famous atoles is Champurrado which is Mexican style hot chocolate. Delicious! 

     As per most of homemade loaves this bread needs proofing time but it well worth the wait. It is needs patience but nothing out of the ordinary. I followed/adapted the recipe by the School of Mexican Gastronomy [Escuela de Gastronomía Mexicana]. The video is in Spanish but you can still watch it by clicking here. You can follow Yuri and see how dedicated and soft spoken he is! So, if you are feeling adventurous, give it a go. For 1 loaf you will need...

  • 250g + 3 tablespoons Strong white flour [Plain flour will be fine]
  • 1 instant yeast sachet [7g]
  • 75g caster sugar
  • 1 egg
  • 45g salted butter
  • 150ml lukewarm milk [might not use it all]
  • Zest of 1 orange
  • 1/4 teaspoon orange flower water 

To glaze

  • Melted butter
  • Caster sugar

How to...
  1. Start by turning on the oven light. This is where we will proof our starter dough and loaf.
  2. On a clean surface or in a large bowl place the flour and make a small volcano. On the edge of the flour volcano sprinkle 1 teaspoon sugar and the orange zest. 
  3. Now before starting to mix the dough we need to do a starter dough. In a small bowl add the 3 tablespoons of flour, yeast sachet and 1 teaspoon sugar. Mix well with a fork or spoon. Add enough lukewarm milk to create a soft dough [not too hard but not too runny either]. You might use about 70ml milk. Put the starter dough in the lit oven or in a warm place to proof [this will take about 20 minutes].
  4. While the starter dough is rising, starting bringing the dough together by adding the butter, 1 tablespoon of sugar, orange flower water, egg and approximately 75ml milk. You might need more milk but the dough should not be too watery so add the milk gradually whilst mixing everything with your hands. Keep kneading for about 5 minutes. 
  5. Now knead in the rest of the sugar, adding the rest of the sugar now will make sure the dough does not get 'watery'. Knead well until no more sugar is visible on your work top, about a further 5 minutes.
  6. Now here's the sticky bit!! Stretch the dough and add the proofed starter dough. The dough might get very sticky but believe me the more you knead the more smooth and soft the dough will get. If you need to add more flour add about a tablespoon on the work top and keep kneading until you get a smooth and spongy dough. Knead for a total of about 10 minutes.
  7. After kneading, shape the dough into an oiled bowl and oil the top of the dough ball. Cover and leave to proof for about an hour wither into the lit [not on] oven or in a warm place.
  8. After an hour, shape the dough into a sausage like shape and cut a 3 inch (7.5cm) piece from the edge and set aside. Shape the rest of the dough into the loaf. Make sure you get a smooth shaped loaf by folding it on itself. See Yuri's video if you don't know what I mean, link above. :) 
  9. Now split the piece of dough we set aside into three pieces, 2 equal pieces and a smaller piece. Dust with flour, so as they won't rise as much as the loaf. Shape the 2 equal pieces into thin cylindrical pieces under you open fingers, this will produce the bone-like shapes. Shape the other tiny piece into a ball.
  10. Place the loaf onto a greased baking sheet and put the bone-like pieces on top crossing each other. Make a small indentation in the middle of the loaf and place the tiny dough ball in the middle. See the picture. 
  11. Place the loaf to proof, covered for a further hour in a warm place.
  12. Preheat the oven to 200°C. When the oven reaches 200°C put the loaf in the oven and immediately turn down the temperature to 180°C. This will 'shock' the loaf and give it good crust. Bake for about 20 minutes.
  13. Take out of the oven, brush with melted butter and sprinkle with the sugar. Tap the loaf to remove any excess sugar.
  14. Serve with hot chocolate or with champurrado. I will be doing some champurrado myself soon.
Enjoy!!
R&A


Sunday, 19 July 2015

Chicken Machboos (Kabsa) - الدجاج كبسة

Our friends Ryan & Leah are moving to Dubai so we decided to do a leaving do for them. Obviously, the theme had to be Arabic so everyone brought Arabic/Middle Eastern food. I decided to prepare some Arabic dishes for everyone to enjoy. After 5 hours slaving away in Simon's kitchen [I do love cooking so, wasn't really slaving haha] I came up with 4 dishes including Lamb & Beef Koftas with Yogurt dip, Basbousa, [a semolina sweet], some Tabbouleh and the star dish, Chicken Machboos which is also known as Fogga or Kabsa. 

Chicken Machboos is basically Chicken & Rice cooked the Arabic way. It is full of spices (by the way, the dish is not spicy [hot] at all) and hence full of flavour. It went down a treat with everyone. Me being a purist I had to find an authentic Arabic recipe, so I did and I adapted it for a huge portion for our banquet. The original recipe is from the book "The Complete United Arab Emirates Cookbook" by Celia Ann Brock-Al Ansari Copyright © 1994 by Celia Ann Brock-Al Ansari. Obviously, if you are cooking for fewer people feel free to use less chicken and rice. One of the most important ingredients of this dish is the Dried black lime aka Loomi which gives it a musty, citrusy flavour (although it is not that overpowering). 

I buy my dried black limes from SousChef. Another ingredient is the Bezar (or Bzar) which is a traditional Arabic spice mix which is very tasty and fragrant. I make my own and you can too (the recipe is below *) but if you cannot find it or do not own a spice grinder do let me know and I will try and maybe I can ship you some. Just drop us an email on ramandaspicypassion@gmail.com

So for a banquet style serving you will need...
  • 1.5 - 2kg chicken pieces (use thighs and drumsticks), skin removed
  • 3-4 tablespoons bezar (recipe below *)
  • salt to taste 
  • About 2 litres chicken stock
  • 3 fresh tomatoes, deseeded and chopped 
  • 8 cloves garlic
  • 4 whole dried black limes (loomi)
  • 1 large stick cinnamon 
  • 10 green cardamom pods
  • 1kg Basmati rice
  • Smen, ghee or butter, for frying

To serve
  • 3 onions, sliced
  • 2-3 tablespoons whole blanched almonds
  • Extra virgin olive oil
  • Dates & raisins [optional]
*To make Bezar spice mixture: In a shallow frying pan, toast the following until fragrant mixing occasionally; 2 tablespoons cumin seeds, 2 tablespoons fennel seeds, 1 large cinnamon stick (broken into 4 pieces), 2 tablespoons coriander seeds, 1 tablespoon black peppercorns. Leave to cool down and grind into a fine powder in a spice grinder. Transfer into a glass jar; add 1 tablespoon turmeric powder and ½ teaspoon chilli powder. Put the lid on and give it a good shake. Store in a cool dry place.


How to...
  • Rub the skinned chicken pieces with salt and bezar. 
  • Gently fry in 2 tablespoons of smen, ghee or butter until brown on both sides. 
  • Transfer the browned chicken pieces to a large deep pan add the stock, garlic cloves, dried black limes, cinnamon, green cardamom pods and tomatoes. Bring to the boil, cover and simmer on medium heat for about 15 minutes. 
  • Taste for salt and add the rice. Bring to a gentle boil again on a low heat (don't stir). Now, cover pan with damp cloth and a heavy lid. Leave to steam on low heat, unopened for 20 minutes, turn off the heat and stand uncovered for about 15 minutes before serving.
  • In the meantime, fry the onions in 1 tablespoon smen, ghee or butter until golden brown and soft. Remove the onions and set aside add in the same pan add the almonds and stir fry until they are slightly brown.
  • Transfer the chicken and rice onto a large platter. Sprinkle the fried onions and almonds on top and serve. If using add some dates and raisins too!!

Enjoy!!
R&A

Saturday, 9 May 2015

Stuffat tal-Fenek - Maltese Style Rabbit Stew

Usually hailed as Malta's national dish, stewed rabbit is popular with most of the Maltese people, whether living on the tiny island or living all around the globe. Rabbits in Malta are famously bred for food and rabbit dishes are a staple in a traditional Maltese family. The most famous rabbit recipes are rabbit stew (Stuffat tal-fenek/fenkata - Stoo-ff-aht tahl- Fehneck/Fehn-kah-tah) and fried rabbit (Fenek moqli - Fehneck mohq-lee). Amanda's mum used to do a wonderful rabbit stew and Amanda used to love eating this so I made sure that during our last trip to the market, to get us a couple of wild rabbits. Around Maltese households, rabbit stew is also traditionally served ladled over some spaghetti. So, in this post I will tell you step by step how to prepare a traditional rabbit stew the Maltese way. It is very easy to prepare and you do not need a huge number of ingredients. For 4 hungry people you will need...

  • 1 rabbit, cut up into pieces
  • 5 medium potatoes, cut into 1 inch pieces
  • 1 large onions, cut into large pieces
  • 500ml (2 cups) tomato passata
  • 1 heaped tablespoon tomato paste, dissolved into 250ml (1 cup) hot water
  • 1 teaspoon sugar
  • Handful frozen peas, defrosted
  • Salt & pepper, to taste
  • Vegetable oil

For the marinade

  • 2 garlic cloves, finely chopped or crushed
  • 500ml (2 cups) good red wine
  • Salt & pepper
To serve
  • 400g spaghetti
  • Grated Kefalotiri or Grana Padano cheese
How to...
  1. Start by marinating the rabbit into the red wine, garlic and salt & pepper. Mix well by hand so as all of the meat is covered in marinade (add more wine if you want to). Put in the fridge to marinate for at least an hour.
  2. Remove the rabbit pieces from the marinade and discard the marinade). In a large frying pan heat some vegetable oil and fry the rabbit pieces until slightly brown. 
  3. Now transfer the rabbit pieces into a large pot and add the passata, tomato paste, potatoes, onion, sugar, salt & pepper. Give it a good stir and simmer on medium heat for about an hour or so, stirring occasionally.
  4. Now add the peas and cook for another 10 minutes. If you are serving it with spaghetti now it is time to cook your spaghetti. Turn off the heat and let it rest for a while until the spaghetti are done. 
  5. Plate up the spaghetti and ladle the rabbit stew on top.
  6. Serve with grated Kefalotiri or Grana Padano cheese.
Enjoy!!
R&A


Saturday, 25 April 2015

Gołąbki - Polish cabbage rolls


Polish food is one of the most famous foods in the Western world. Along with Pierogi - Polish dumplings, Gołąbki - Polish cabbage rolls are a favourite not just with people of Polish origin but with anyone that has the honour of biting into these tasty traditional dishes. Once eaten, you will come back for more, guaranteed. These cabbage rolls are well worth boiling and separating the cabbage leaves (the tricky bit). I can vouch that once cooked these cabbage rolls are addictive. I used a mixture of minced beef and pork and the result was some really delicious, tasty and juicy cabbage rolls. If you find it you can also add some minced veal as well. The accompanying tomato sauce gives it the Eastern European taste, the tanginess of the tomato sauce, the sweetness of the caraway seeds, the herbiness of the marjoram and parsley...oh, heaven! Give them a go, you will not be disappointed. You will need...

For the Gołąbki - cabbage rolls
  • 1 large cabbage head
  • 750g minced beef & pork
  • 1 large carrot, grated
  • 2 eggs
  • 1 cup cooked rice, cold
  • 250ml (1 cup) tomato passata + ½ cup tomato passata
  • 1 onion, finely chopped
  • 2 garlic cloves, finely chopped
  • 1 ½ teaspoons salt
  • Fresh ground black pepper, to taste
  • A knob of butter, for frying
For the tomato sauce
  • 300ml (1 ½ cups) beef stock
  • 1 heaped tablespoon tomato paste
  • 175ml (¾ cup) tomato passata
  • ½ teaspoon dried marjoram
  • 2 teaspoons dried parsley
  • ½ teaspoon caraway seeds
  • 1 teaspoon sugar
  • Fresh ground black pepper, to taste
  • 30g butter
  • 30g plain flour

How to...
  1. Start by boiling a very large pot of salty water. Now put the cabbage core end up and using a paring knife remove the hard core. Put the cabbage in the boiling water and boil for about 10 minutes. At this point some of the leaves will start to come off, that is what we want. After 10 minutes, carefully take the cabbage out of the boiling water, be very very careful as it will be very hot. Use 2 large spatulas or ladles when doing this process. Leave to cool slightly. When slightly cool, start peeling off the cabbage leaves with extreme care (remember they are the star ingredient of the dish). Separate them and put them flat on a platter and set aside to cool further.
  2. Now it is time to prepare the filling. Start by frying the onions and garlic in the butter until brown (about 5 minutes on medium heat). Set aside to cool. In a large bowl add the minced meat, cooked rice, grated carrot, passata, eggs, cold fried onion/garlic mixture and salt & pepper. Put a pair of gloves on (optional) and mix by hand until all ingredients are incorporated, do not mix too much or else the meat will toughen. 
  3. Preheat the oven to 180°C/350°F.
  4. Now here comes the fun part, firstly if the spine of the leaf is too tough carefully trim it with a sharp knife). Now spread the cabbage leaves end bit away from you, put some filling (about a tablespoon or more...this depends on the size of the leaf), now roll the sides first and roll up all the way up to the stalk/spine part. Stack them up into a casserole next to each other (see picture).
    Keep going until all the filling is used up. If you have spare leaves or torn leaves save them so you can cover the rolls in the end. 
  5. Now fill the casserole with water half way up to the rolls and add the half cup of passata. Spread the torn/spare leaves on top, cover and put into the preheated oven for 30 minutes.
  6. Whilst they are cooking away, start the tomato sauce by melting 30g butter, add the flour and cook stirring constantly for about 2-3 minutes. Add all the other sauce ingredients and stir until thickened, lower the heat and simmer for about 10 minutes, make sure you keep on stirring or it will stick to the bottom of the pot. Turn off the heat and remove from the heat.
  7. After 30 minutes take the cabbage rolls out of the oven and pour the tomato sauce on top, cover again and put in the oven for another 30 minutes.
  8. Take out of the oven, let stand for about 10 minutes and serve hot with a couple of spoonfuls of tomato sauce on top. Gołąbki can also be enjoyed cold as appetizers...an absolute delight!!
Enjoy!!

R&A

Saturday, 14 March 2015

Marmitako Euskera - Basque Fresh Tuna Stew

Marmitako in Basque means 'from the pot' and is also the name for this tuna and potato based stew. Using the freshest tuna possible this stew will turn into a gorgeous unique stew. In this recipe I use Choricero peppers which are dried red Spanish peppers that come from Spain but if you do not have them do not worry just omit them. I also made my own fish stock but you can use any fish stock cubes or stock pots you have available. I must admit that both Amanda and myself loved this recipe and will definitely give it another go. Fresh tuna is one of my favourites when it comes to fish and being the main ingredient in this wonderful dish made this an instant favourite!! Just because I love flags, here is the Basque flag :) For six people you will need...

  • 500g fresh tuna, cut into chunks
  • 500g potatoes cut into chunks
  • 1 red or yellow pepper, diced
  • 1 green pepper, diced
  • 2 choricero peppers, soaked in boiling water for 1 hour, flesh scraped (optional)
  • 2 tomatoes, peeled, deseeded and chopped
  • 3 garlic cloves, finely chopped
  • 2 small onions, finely chopped
  • 1.5 litres fish stock
  • A pinch of cayenne pepper
  • 75ml white wine
  • 240ml (1 cup) tomato passata
  • Salt & pepper, to taste
  • Olive oil, to serve

For the fish stock...
  • 2 litres water
  • 1 large fish head or 2 small ones
  • 1 onion, sliced
  • 1 spring onion, chopped
  • 1 tsp dried parsley
  • A pinch dried thyme
  • 1 bay leaf

How to...
  1. If making your own stock, put all the ingredients in a pot and bring to a boil. When it boils, skim the foam that will float on top of the stock. Simmer for 20-25 minutes. Turn off the heat and strain through a fine sieve.
  2. Now onto the stew. In a saucepan, add onions, garlic, red pepper, green pepper and tomatoes, cook until soft about 10-15 minutes on medium high heat stirring occasionally. Now add the wine and when the wine has evaporated, add the passata and choricero pepper flesh (if using). Turn off the heat and blend with a stick blender or in a blender and set aside.
  3. In the meantime, in a large pan add the strained stock, cayenne pepper and salt & pepper. Bring to boil and add the potatoes. Cook for 15 minutes. Add tomato/pepper mixture and stir well. Simmer for a further 10 minutes.  Add tuna chunks, stir once and simmer for about 5 minutes. Do not overcook the tuna as it will crumble and ruin the stew. Turn off heat and set aside to sit for about 15 minutes before serving.
  4. Serve warm with crusty bread.
Enjoy!!
R&A


Pastizzi

Pastizzi are ever so popular in Malta. There are so good. My dad used to buy loads of these on a Sunday morning. They are made with flaky all butter puff pastry and filled with a variety of two fillings, with peas or with ricotta cheese. Unfortunately pastizzi are not available here in the UK so I decided to make my own on a Sunday morning and surprise my wife which as every Maltese person is a big fan. She was so surprised :) The hardest bit is always the pastry which honestly nobody can perfectly replicate the one one buy from Maltese pastizzerias [Pastizzi shops]. I used ready-made all butter puff pastry which turned out to be a success...luckily...my favourite pastizzi back in Malta where from Roger's Bakery at Zejtun. He used to sell these from his van on  a Sunday morning by the village church, he also sells frozen ones from the shop. So if you are a Maltese immigrant do give these a go...they are really worth all the work :) You will need...

For the Pastizzi tal-Piżelli - Pea ones

  • 300 g dried marrowfat peas
  • 1 onion, finely chopped
  • Oil for frying
  • Salt & pepper
  • 1 tsp Bicarbonate of soda
  • 1 egg beaten, to use as egg wash
  • 500 g all butter puff pastry


Method


  1. Soak the peas overnight. Wash them in plenty of salted water. Put the peas in a pan and cover generously gently with water, add a teaspoon of bicarbonate of soda. Cook the peas until they’re very soft. Drain well and set aside.
  2. Preheat the oven at 200°C.
  3. In the meantime, fry the onions in oil until soft and transparent. Add the onion to the cooked peas, mix well and season to taste.
  4. Roll out the puff pastry thinly and cut out circles about 10cm in diameter. Egg wash the edges. Put about a teaspoon of the mixture onto each of the circles in the middle. Pick up the pastry circle from two edges and seal the edges together. Egg wash and bake in the preheated oven for about 20 minutes or until the pastry is well golden.
  5. Serve hot.


For the Pastizzi ta' l-irkotta - Ricotta ones

  • 300 g ricotta
  • 2 eggs
  • Parsley, finely chopped [optional]
  • 1 egg beaten, to be used as egg wash
  • 500 g all butter puff pastry
  • Salt & Pepper


Method

  1. Mix well the ricotta, eggs, parsley and salt & pepper.
  2. Roll out the puff pastry thinly and cut out circles about 10cm in diameter. Egg wash the edges. Put about a teaspoon of the mixture onto each of the circles in the middle. Pick up the pastry circle from two edges and seal the edges together. Egg wash and bake in the preheated oven for about 20 minutes or until the pastry is well golden.
  3. Serve hot.


Enjoy!!!
R&A


Monday, 22 December 2014

Spaghetti al Nero di Seppia - Spaghetti with Cuttlefish

Hello all, I know I have not blogged any recipes lately but I was quite busy working towards a career change! Oh yes...quite happy and excited about the new job starting in January but until then I have two weeks off and hopefully I will post some delicious recipes that we have prepared lately. One recipe that we made and loved is the classic Italian recipe Spaghetti al Nero di Seppia which basically is spaghetti in a black sauce!! Yes a black sauce which is the result of the addition of the cuttlefish's ink to the cuttlefish sauce. Try it out, if you have not got a fishmonger close-by, you can buy sachets of cuttlefish ink online...I do! They are very cheap as well. This pasta sauce is very fast and easy to prepare...just make sure that cuttlefish you are using is fresh. So for 2-3 people you will need...
  • 200g spaghetti
  • 600g cleaned cuttlefish (including tentacles), cut into small pieces
  • 2 garlic cloves, finely chopped
  • 100ml (½ cup) white wine
  • 2 sachets cuttlefish ink or 1 fresh cuttlefish ink sac
  • 2 tablespoons chopped fresh parsley (or 1 tablespoon dried parsley)
  • Extra virgin olive oil
How to...
  1. Heat about 2 tablespoons of extra virgin olive oil together with the garlic in a small pan. Cook until the garlic is aromatic and golden.
  2. Now add the cuttlefish and parsley and stir well. Cook on medium heat for about 15 minutes. Increase the heat on high and add the wine and cook until the wine has evaporated (at this point you can cook the pasta and drain it). Reduce the heat to medium again and add the cuttlefish ink sachets. Stir well. If using the fresh cuttlefish ink sac, add the whole and break it carefully with a wooden spoon. Heat thoroughly.
  3. Add the sauce to the pasta and serve with extra chopped parsley and extra virgin olive oil.
Enjoy!!
R&A


Saturday, 8 November 2014

Ottini - Maltese Number 8 Shaped Biscuits

These Maltese biscuits were one of my favourites whilst growing up and to be honest they still are as I grew to miss them whilst living here in England. So obviously I had to make them. The recipe is very similar to Qagħaq tal-Ġunġlien (Maltese Biscuit Rings with Sesame Seeds) with some ingredient changes and also, this time I used a food processor. Needless to say there was less mess in the kitchen and took less time to prepare!! It is quite easy to shape a number 8, actually easier than you had thought. Also, when I bake my OCD kicks in and I always have to weigh the prepared dough and divide its weight into equal and even shapes haha. Using this method I always get equally shaped (well approximately) finished products. So if you miss these biscuits like I do, here is how I made 10 of them first thing on a Saturday morning. You can dunk these in hot tea or coffee, that's how we like them :) You will need...
  • 250g plain flour
  • 85g caster sugar
  • 1 ½  teaspoons baking powder
  • 1 egg
  • ½  teaspoon ground aniseed
  • Pinch ground cloves
  • 90g salted butter, at room temperature, cut into cubes
  • 1 tablespoon vegetable oil
  • 2 tablespoons water
  • 1 tablespoon orange flower water - Ilma zahar (if not available add another tablespoon of water)
  • Grated zest of 1 orange
  • Sesame seeds
How to...
  1. Preheat the oven to 180°C.
  2. If you are using a food processor, start by adding the flour, sugar, spices and baking powder into the food processor and pulse for a few minutes. If not using a processor add the dry ingredients in a large bowl and mix well. Add the butter and blend until all butter has been incorporated into the flour. If using your hands, mix the butter in with your fingertips until mixture resembles fine breadcrumbs.
  3. In a small bowl beat the egg and mix in the orange zest, water, orange flower water and oil. Mix well. Add to the dry ingredients whilst food processor is running and blend until the dough comes together. Again if using your hands, add the wet ingredients to the dry ingredients mix well until you get a soft dough.
  4. Divide the dough into 10 equal sized balls (about 50g each), a bit bigger than golf balls and roll into thin long sausage like shapes, about 30cm long. Shape into a number 8 and carefully transfer into a plate with sesame seeds turning over to cover both sides with the seeds. Place on a tray lined with greaseproof paper and bake in the preheated oven for about 20-22 minutes.
  5. Let cool down and serve with tea or coffee.
Enjoy!! 
R&A


Saturday, 18 October 2014

Coronation Chicken

Coronation Chicken was invented by Constance Spry and Rosemary Hume, both principals of the Cordon Bleu Cookery School in London, whilst preparing dishes for the banquet of the coronation of Queen Elizabeth II in 1953. I decided to do some research on this recipe and adapted a couple of recipes that I found online. This is the best version I have found, an absolute delight. Considered as a retro recipe here in the United Kingdom, it tried to make its comeback as a pre-prepared sandwich filling available at major supermarkets. It definitely goes without saying that the supermarket stuff is rubbish and having made our own Coronation chicken it is definitely galaxies away from the real thing. It is quite easy to prepare, boil chicken, let cool, take meat off the chicken and mix all the ingredients. Cool and enjoy!! Do try it, you can serve it as a salad, served with boiled rice, pilaf rice, naan bread, indeed as a sandwich filling...anything you like really. You can refrigerate the leftover and believe me it will definitely taste better. You will need...
  • 1 whole chicken, 1½ kg 
For the chicken
  • 1 tsp salt
  • 1 cinnamon stick
  • 6 black peppercorns
  • Thumb-sized piece of ginger, sliced
  • 1 bay leaf
  • Pinch of saffron strands
For the sauce
  • 200 ml  mayonnaise
  • 300 ml Greek yoghurt (or other thick yoghurt)
  • Chopped fresh coriander
  • 5 tbsp good quality mild mango chutney (I use Geeta's)
  • 50 g soft dried apricots, finely chopped
  • 20g raisins
  • 3 tbsp curry powder
  • 2 ½  tsp Worcestershire sauce
  • 1 tsp freshly grated ginger
  • Flaked almonds, to serve
How to...
  1. Start by cooking the chicken, put the chicken in a large pot, add the salt, cinnamon, peppercorns, ginger. bay leaf and saffron. and cover with water. Simmer gently for about 2 hours 15 minutes (basically boiled chicken cooking time is 30 minutes per 454g (1 pound) plus an extra 30 minutes). When cooked, take the chicken out of the pot and leave to cool completely. When cool, remove the meat off the carcass and make sure that any large meat pieces are chopped into small bite size pieces.
  2. In a small dry frying pan, toast the curry powder (to remove any bitterness) for a about 1-2 minutes. Set aside.
  3. In a large mixing bowl, add the chutney, raisins and apricots and mix well. Now add the toasted curry powder, Worcestershire sauce, grated ginger, mayonnaise and Greek yoghurt and mix well again. Add the chopped coriander & diced chicken and fold in gently. Chill the mixture in the fridge for at least an hour.
  4. Before serving sprinkle with the flaked almonds. Serve with basmati rice or some delicious Peshwari naan bread.
Enjoy!!
R&A

Monday, 22 September 2014

Stuffat tal-Qarnit - Maltese Octopus Stew

Well here is another classic from the Maltese islands which is one of Amanda's favourites...oh and mine as well!! Not everyone like octopus because of its rubbery texture but try and cook it this way and you will definitely love it. It is absolutely gorgeous served on some freshly cooked spaghetti (that is how this stew is usually served in Malta). Octopus in the Maltese islands is very common and is quite easily caught as they lurk around the rocky seashores of the islands. I remember going to the very famous Marsaxlokk market (do check it out if you ever visit Malta) on a Sunday morning and having a peek at these creatures that used to be still alive, crawling around the fish trays of the fishmonger. I also remember that every time we bought a huge octopus to cook at home, my mother used to put it in the kitchen sink with some salty water before cooking it and it was not the first time that we saw the octopus crawling out and attaching its tentacles to my mother's kitchen tiles. It was hilarious. Any way, do try this recipe as it is delicious. For 4-5 people you will need...

  • 500g spaghetti
  • 1 kilo octopus, cleaned and cut into bite size pieces
  • 2 medium onions, roughly diced
  • A handful of frozen peas, defrosted
  • 6 small potatoes, cut in half or thirds
  • 500ml tomato passata
  • 250ml boiling water
  • 2 tablespoons tomato paste
  • 1 teaspoon sugar
  • A handful of green olives
  • ½ cup red wine
  • 2 tablespoons vegetable oil
  • Salt & pepper, to taste

How to,,,
  1. In a heavy based pot heat the oil and cook covered on medium heat until soft and transparent.
  2. When onions are cooked add the octopus and increase the heat, cook for about 10-15 minutes stirring occasionally. Sometimes it releases a lot of water so make sure all the water is evaporated.
  3. Add the wine and stir until all the wine has evaporated. 
  4. Now add the passata, water, tomato paste, olives, potatoes, sugar and season well with salt and pepper. Stir well bring to the boil and simmer on medium heat for about 45 minutes stirring occasionally so it does not stick.
  5. In the meantime cook the spaghetti al dente.
  6. After 45 minutes, add the peas to the octopus sauce and simmer gently for another 15 minutes.
  7. Drain the spaghetti. Serve in a bowl or plate and spoon some octopus stew/sauce on top.
  8. Serve hot.

Enjoy!!
R&A


Sunday, 14 September 2014

Aljotta - Maltese Fish Soup

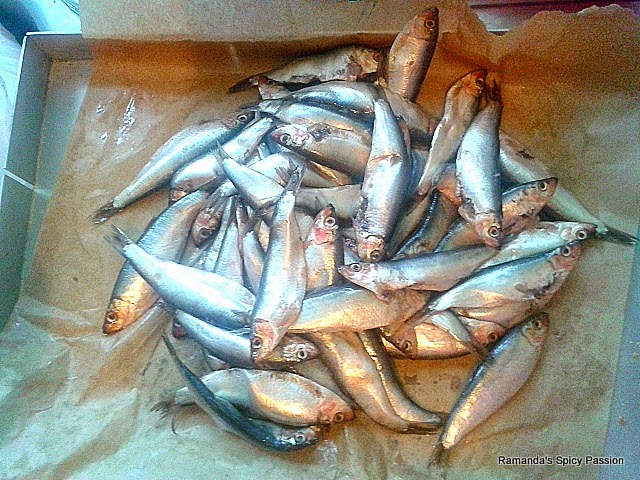
This Maltese soup obviously comes to be because of Malta's geographical location, that is, an island in the middle of the Mediterranean sea. Originally this soup was made by fishermen's wives to use up any small fish that would have gotten into the fishermen's nets. Most of the time this soup is made using these very famous Mediterranean small fish called Vopi (in Maltese). Funnily enough, these fish in English are called Boops Boops or Bogue, which is a species of small sea-bream. These fish are available in any Mediterranean fish market from Spain to Turkey but since I cannot find them over here in England I usually use either sprats or sardines. The soup will turn out equally delicious. This soup needs to have liquid consistency, like a broth and usually rice is added to it. Also, Amanda and most of the Maltese people leave this soup as it is but if you do not like small fish bones (which are completely edible) all you need to do is put it through a sieve before you ladle the soup into your serving bowl. It can be served as a starter or even as a main meal on its own when bread with crusty bread (preferably Maltese bread). Give it a go and if you want let us know if you like it or not. For about 6 portions as a starter you will need...

  • 500g small fish like vopi, sprats, sardines, gutted but left whole
  • 1 onion, finely chopped
  • 6 garlic cloves, finely chopped
  • 4 tomatoes, de-seeded & chopped
  • 2 tablespoons tomato paste
  • 1 tablespoon dried mint
  • ½ teaspoon dried marjoram
  • 100ml dry sherry or dry white wine
  • 2 Knorr fish stock pots or stock cubes
  • 1.5 litres boiling water
  • Salt & pepper
  • 2 tablespoons vegetable oil
  • Lemon wedges, to serve

 How to...
  1. Heat the oil and cook the onion & garlic until golden brown.
  2. Add the tomatoes, fish, mint, marjoram, salt, pepper and stir slowly, so as not to break the fish. Cook for about 5 minutes stirring occasionally.
  3. Add the sherry or wine, give it a stir and cook until all liquid has evaporated.
  4. Now add the stock pots or cubes to a measuring jug and dissolve them in some boiling water, about half a litre or so. Now add to the fish in the pot, add the remaining litre of boiling water. Stir carefully, add the tomato paste and stir again.
  5. Bring to the boil and simmer on low to medium heat for about 30 minutes.  Now if you do not like munching on the edible tiny fish bones, just pass the soup through a fine sieve before serving.
  6. Serve hot with lemon wedges.
Enjoy!!
R&A


Sunday, 10 November 2013

Maltese Imbuljuta tal-qastan - Boiled Chestnuts with Cocoa


This Maltese recipe is a traditionally served after Christmas midnight mass or even as a warm drink on New Year's Eve. The aroma of spices and citrus certainly fills the home with a sense cosiness and homeliness. After cooking, the chestnuts are usually mashed and served warm. In my family we used to add evaporated milk to our cocoa chestnuts, this makes the drink taste even better. Also my parents used to booze it up a bit by adding some whisky!! It also is prepared using dried chestnuts, so if using fresh chestnuts, make sure you adjust the method accordingly. The result is just exquisite and when we recently prepared this recipe it soon triggered nostalgic memories of our childhoods when our mothers used to prepare it for us. Give it a go! You will need...

  • 500g dried chestnuts, soaked in water for 24 hours
  • 3 tablespoons sugar
  • 2 tablespoons unsweetened cocoa powder
  • 1/4 tsp ground cloves
  • Peel of half an orange
  • Peel of half a tangerine or clementine
  • Whisky, to taste (optional)
  • Evaporated milk, to serve


  1. Start by cleaning well the pre-soaked chestnuts from all the brown bits they might have left on them and discarding the water that they were soaked in. 
  2. Put the chestnuts in a pot and cover with water. Add the sugar, cocoa, cloves and citrus peel and stir well.
  3. Bring the chestnuts to a boil, lower the heat and simmer for about an hour or until the chestnuts are soft.
  4. When chestnuts are cooked, add the whisky if using and stir again. Remove the citrus peel from the pot and roughly break the chestnuts with a masher. 
  5. Serve hot in bowls or mugs equalling the amount of chestnuts and cocoa liquid. Add evaporated milk to taste.


Enjoy!!

R&A


Thursday, 7 November 2013

Brungiel Mimli - Maltese Stuffed Aubergines

In Maltese cuisine stuffed aubergines and stuffed marrows are very popular. They are usually stuffed with a minced beef mixture and baked into a hot oven. The smell of them cooking is a classic which one can smell across Maltese towns and villages on a Sunday morning. My mum used to top them up with a slice of cheese and I used to loved them, to be honest when I was a kid I only used to eat the stuffing and obviously get told off for leaving the aubergine on the plate. Now I can say that aubergines are one of my favourite vegetables. Actually, it is quite impressive the fact how your palate starts to settle down when you get older and eat foods that you used to hate when you were a kid. Anyway, try this dish and you won't regret it, they are very easy to prepare. For 2 people you will need...

  • 2 large aubergines
  • 400g lean beef mince
  • 1 onion, finely chopped
  • 1 teaspoon fennel seeds
  • 2 tablespoons finely chopped parsley
  • 1 teaspoon dried mixed herbs
  • 2 tablespoons grated Kefalotiri or Parmesan cheese
  • 2 eggs, beaten
  • Salt & pepper, to taste
  • 2 slices Edam cheese
  • Olive oil, for frying
How to...
  1. Start by slicing the aubergines lengthwise. With a teaspoon carve out an oval shaped hollow at the wide end of the aubergine. This is where you will put the stuffing. Set them aside. Chop the aubergine flesh. 
  2. In a large pan on medium heat, heat some olive oil and fry the fennel seeds until fragrant, about 30 seconds. Add the onion and aubergine flesh and fry until onion is soft and transparent, about 10-15 minutes. When onion is cooked add the beef mince and cook until cooked thoroughly about 20 minutes. Drain any excess fat. Set aside and let cool down for about 10 minutes.
  3. Preheat the oven to 200°C.
  4. Rinse the aubergines from all the salt and pat dry using kitchen towel. 
  5. In a large mixing bowl add the onion/beef/fennel mixture, mixed herbs, parsley, salt & pepper, grated cheese and beaten eggs and mix well until well combined.
  6. Fill the aubergines and top with half a slice of Edam cheese. 
  7. Place into an oven dish, pour a glass or two of water and bake into the preheated oven for about 45 minutes or until aubergines are tender.
  8. Serve hot with roast potatoes.
Enjoy!!
R&A


Saturday, 2 November 2013

Dutch Stamppot with Merguez Sausage


This Dutch dish is a very simple one but very tasty, it is basically mashed potatoes and vegetables. In Holland it is sometimes served with Rookwurst (a smoky Dutch sausage) but we used Merguez which is a North African spicy sausage. If you cannot find Merguez you can also use fresh chorizo if you like or even Cumberland sausages. Traditionally the potatoes are boiled apart but recently potatoes and veg have been boiled together and then mashed. Dutch people love making a hole in the middle of the mashed veg and pouring gravy in it. This dish is very similar to Bubble & Squeak (in England) and Colcannon (in Ireland). It is quite a filling dish and very easy to prepare. You will need...
  • 500g potatoes, diced
  • 400g pumpkin or butternut squash, diced
  • 4 medium carrots, sliced
  • 2 large parsnips, sliced
  • 1 large turnip or swede, chopped
  • 1 leek, washed and sliced
  • 1 onion, finely chopped
  • 200g kale or Savoy cabbage, washed and shredded
  • 50g butter
  • Salt & pepper, to taste
  • 4-6 Merguez sausages [or Cumberland sausages]
  1. Place all the chopped vegetables, apart from the kale in a large steam pot and steam for 20 minutes. [Alternatively, boil the vegetables].
  2. Cook the sausages to your liking, we grilled ours. 
  3. Whilst the sausages are cooking, steam the kale for 7½ minutes.
  4. When the vegetables are cooked, drain well and roughly mash them with the butter, salt & pepper. Add the steamed kale and stir in the mashed vegetables.
  5. Serve the mash in the middle of the plate and top with the cooked sausages. You can also serve with gravy or a spicy chilli & tomato sauce!
Enjoy!!
R&A


Saturday, 26 October 2013

Tartiflette Savoyarde


I first had Tartiflette from my friend Didier's French restaurant. I instantly fell in love with it. It is French cuisine at its best, butter, cream and obviously Reblochon cheese. Reblochon is a French cheese that comes from the Alps region of Haute-Savoie, originally in the Thônes and Arly valleys. It is made from unpasteurized cow's milk and is very soft in texture and nutty in taste. This simple dish is a delectable unique taste of France and the distinctive taste of Reblochon makes it a must for everyone who loves and appreciates French cuisine. Give it a go and am quite sure you will love it. For 4 people you will need...
  • 1 Petit Reblochon (200g), sliced in 1 cm slices
  • 200ml crème fraiche
  • 500g potatoes
  • 150g bacon lardons
  • 1 large onion, sliced
  • Butter & olive oil for frying

  1. Start by cooking potatoes with the skin on. Make sure you do not over cook them. Use a skewer to check if they are cooked. As soon as the skewer goes through take them off the heat. Peel them carefully and slice them in 1cm slices.
  2. Heat some butter and olive oil in a frying pan and fry the onion until translucent and soft. Add the bacon lardons and cook until brown. 
  3. Take the onion/bacon mixture out of the pan and in the same pan fry the potato slices until they are golden.
  4. Preheat the oven to 200°C.
  5. Put half the potato slices in a buttered small oval oven dish  and pour half of the cream and scatter half of the onion/bacon mixture. Repeat the process until you use all the potato slices, cream and onion/bacon mixture.
  6. Now to finish the dish, place the Reblochon slices on top and bake for about 15-20 minutes until the cheese is melted. Serve hot with a glass of good French white wine.
Enjoy!!
R&A

Baked Imqaret - Maltese Date Pastries


Imqaret are a very famous deep fried sweet Maltese treat. There used to be just one place where Maltese people used to buy them, "il-Gabbana ta' Bieb il-Belt' but later on they could easily be found at village feasts and local markets' mini-stalls. We missed them so much that we had to make our own. We chose to bake them and used already made pastry. If you want to make your own pastry it is quite easy to do and you can always deep fry them!! The deep frying method does give it a unique taste but in my opinion the taste is in the filling. The delicious orange blossom water that we Maltese have been using for ages, from curing a poorly tummy to creating delicious tasty sweet pastries and the use of aniseed give these pastries their unique taste. Try them out, they are exquisite!! We used only 250g dates but feel free to double the amount to make more. You will need...

  • 250g dates, pitted and chopped
  • 1-2 tbsp water
  • 1 tsp grated orange zest
  • 1 tsp orange flower water
  • Pinch ground cloves
  • ½ tsp ground aniseed
  • 1 ready-made sheet shortcrust or sweet pastry
  • Flour, for dusting
  1. Start by blending all the ingredients, apart from the pastry obviously in a food processor. Add the water bit by bit, you do not want a very liquid mixture. Do leave the mixture a bit lumpy. Set aside.
  2. Preheat the oven to 200°C.
  3. Dust your kitchen bench with flour and roll the pastry sheet, using a flour dusted rolling pin roll out the sheet so it becomes thinner. Cut into two long strips, put the mixture in the middle alongside the pastry strip leaving an inch on each so you can seal easily. Wet the edges with some water and cover with the other strip of pastry and seal well, packing the date mixture well. Slice into diamond shapes or slices (see picture) and bake into the preheated oven for 20-25 minutes. 
  4. Serve hot or cold.
Enjoy!!
R&A

Saturday, 10 August 2013

Qagħaq tal-Ġunġlien (Maltese Biscuit Rings with Sesame Seeds)


Served with a sweet cup of tea creamed with evaporated milk, these Maltese biscuits have been very famous amongst the Maltese people. They can be found in any bakery and supermarket all over the island. So, I felt like a nice cup of tea but had no biscuits and considering today was quite cooler than usual, I decided to make these delicious beauties. Once you get the preparation done, they only take minutes to prepare and bake, but unfortunately seconds to devour! Give them a go and share them with your friends (or not). Oh well, give them our recipe at least. For 8 large rings (you can always make more by making them smaller) you will need...

  • 250g plain flour
  • 100g sugar
  • 7g baking powder
  • 1 egg
  • Pinch of salt
  • Pinch ground aniseed
  • Pinch ground cloves
  • 85g butter, at room temperature, cut into cubes
  • 1 Tablespoon vegetable oil
  • 3 tablespoons water
  • Grated lemon rind
  • Grated orange rind
  • Sesame seeds
Method

  1. Preheat the oven to 180°C.
  2. In a mixing bowl mix flour, salt, sugar, baking powder and spices, add the butter and rub into the mixture until it resembles breadcrumbs.
  3. In a separate bowl crack the egg, add the oil, water and lemon and orange rinds and mix them well.
  4. Add to the flour/butter mixture and mix by hand until you get a soft dough. Shape into a ball.
  5. Put the sesame seeds in a plate.
  6. Dust your hands with flour and get some dough (about the size of a golf ball) and roll into a long fingerlike shape, carefully place the dough into the sesame seeds and turn slowly to coat. Shape into a ring and transfer to a buttered and floured baking tray.
  7. Bake for about 20 minutes. Let cool down and serve.
Enjoy!!
R&A